top of page

BUSTS
Crimson Pool Productions


The Frankenstein Monster ~ 1935
 Frankenstein 1935My wife purchased this model from Needful Things at the 2003 WonderFest. The likeness was so faithful to Boris Karloff that I felt this bust had to get the full treatment. The scratchbuilt base was made from Styrofoam, covered with Celluclay paper-mache. Oil-based paints made the exterior of the base extremely durable. |  Frankenstein 1935 RightI reinforced the hollow head with plaster of Paris, then ground away the molded hair with many sanding drums in a Dremel tool. Aves Apoxie Sculpt restored the Monster's scalp, along with the sutures and staples. After painting, I added crepe hair, adhered with Liquitex acrylic gel. |  Frankenstein 1935 LeftA good friend allowed me to cast his shoulders in plaster bandages, which I reinforced with more plaster of Paris (yes, the bust weighs a LOT). That's a size 52 jacket on the Monster, courtesy of a local Goodwill store. |
|---|---|---|
 Frankenstein 1935 FrontI found a pair of oversized acrylic human eyes at Van Dyke's taxidermy supply - after I had finished the bust. There was nothing else I could do but grind out the eye sockets with my Dremel tool, glue in the new eyes, and then remodel the eyelids with Aves Apoxie Sculpt. |
Haunted Glo-Heads Collection
 Haunted Glo-Heads!In 2010, Round2/MPC reissued the Haunted Glo-Heads for the first time since the 1970s. These were nifty, snap-fit glow-in-the-dark busts of a quartet of monsters. I decided to add a fifth monster so I could compete with the Haunted Glo-Heads as a collection in IPMS contests. |  HGH Alien RightThe Alien started as an incomplete 1970s issue Vampire that I had in my stash. When the Glo-Heads were re-released, AMAZING FIGURE MODELER magazine, the Monster Model Review web site, and MPC held an online model contest. The contest included a Conversions category, which was what got me started on this model. |  HGH Alien LeftI based the Alien on the creature as described in John W. Campbell's 1938 novel, WHO GOES THERE? (the story that became the basis for the 1951 and 1982 Sci-Fi films, THE THING). Some inspiration also came from the Hans Bok cover art for the book. |
|---|---|---|
 HGH Alien BackThe Vampire's hand was turned 180 degrees, the fingers were nipped off, and wire armatures covered with Aves Apoxie Sculpt became tentacles. The bases for all the Glo-Heads are the resin slabs from Geometric Designs busts. I found a font online that matched that of the box art, which I used to make the nameplates. |  HGH Apeman FrontHaving gone so far with the Alien, I wanted to see what could be done to jazz up the other Glo-Heads. I figured that this bust was of an "ApeMAN", so I painted the face in lighter, more human flesh tones and gave the beast green eyes. |  HGH Apeman RightApplying real hair to a model is a dicey proposition. I think the Glo-Heads are about 1/3 scale, the smallest on which I'd want to try gluing hair. On a smaller scale model, real hair would look too coarse. |
 HGH Apeman LeftThe resin bases give the Glo-Heads firm support, otherwise they'd fall over. I purchased five round wooden craft plaques to anchor the resin. The presentation adds a little "gravitas" to these simple busts. |  HGH Mummy FrontThe Mummy was a gamble - could I add real cloth wrappings successfully? The first step was to reinforce the interior of the model with cheap plumber's epoxy putty (more economical for interior work than Aves). Then I ground off the molded on wrappings with the Dremel tool, sparing only the Mummy's face. |  HGH Mummy LeftOnce all the molded wrappings had been removed I used Aves to extend the Mummy's withered face. That way, the cloth wrappings could hang over the face realistically. The fingers were covered with very thin strips of fabric. |
 HGH Mummy RightThe fabric Mummy wrappings were patterned from the box art and instructions to match the molded bandages. They were made from dyed linen and adhered with a 50-50 mix of Aleene's Tacky Glue and water. When dry, I tweaked the color of the wrappings with model paints. Ground up artists pastels were applied for the final dusty touch. |  HGH Mummy CUThe Mummy's coloring was based on that of real mummies of which I found photos online. I removed the blind left eye, replacing it with an empty socket and shriveled eyelids, courtesy of Aves. His "good" eye was covered with the clear lens from a googly doll eye. |  HGH Mummy BackAcrylic paints helped me to "age" the Mummy's wrappings. |
 HGH Vampire_FrontThe Vampire was the final bust that I finished for the Haunted Glo-Heads collection. Sad to say, it was 12 years in the making. |  HGH Vampire_RightLike the Mummy and the Werewolf, I first reinforced the head halves with Aves putty. The hair and eyebrows were just as thickly molded on this bust as the detail I removed on the other two. |  HGH Vampire_LeftOnce the bust had been assembled, I ground off the hair and eyebrows. I also used my Dremel tool to remove the slit-pupil eyes and shape the insides of the eyelids to accept taxidermy reptile eyes. After the flesh colors were painted, I attached crepe hair to the bust with Liquitex Acrylic Matte Varnish. |
 HGH Vampire_BackI felt that if I was going to put real hair on the bust, then the fabric parts should be real as well. My wife gave me an old umbrella, from which I took the black silk to cover the Vampire's cloak collar and coat sleeve. His shirt collar and cuff are covered with pieces cut from an old handkerchief. His glove was covered with the flocking made for simulating carpets in model cars. |  HGH Vampire_BatI took some pains with the bat. Its wings were left largely unpainted, as I thought the glow in the dark plastic looked appropriate for the thin flesh of the wings. The mouth was empty, so I added some teeth with Aves putty. The eyes were decorated with pieces of red glitter. |  HGH Vampire_Close UpOne of the big challenges with these busts was to fill the seams between the painted snap-fit interiors of the mouths and the insides of the lips. Then I had to maneuver paint brushes past the teeth to touch up the seams. This extra challenge, coupled with the wonky parts fits, made these "simple" kits anything but simple to build. |
 HGH Werewolf_FrontAfter far too long, I finally got around to finishing the last two Haunted Glo-Heads. This is the Werewolf. |  HGH Werewolf_RightThe major structural changes I made to the Werewolf were to reshape the rectangular nostrils for a better resemblance to a wolf's snout, and to flesh in the hollow undersides of the hands. All this work was done with good old Aves putty. |  HGH Werewolf_LeftI didn't care for the molded slit-pupil eyes. Wolves can have yellow eyes, but Van Dyke's didn't have any small enough to fit the bust. So I settled for yellow bird eyes. |
 HGH Werewolf_RearThe nature of the Haunted Glo-Heads makes the hollow backs a bit awkward to detail. But the Werewolf's fur nicely camouflaged the area. |  HGH Werewolf_Close UpThe molded fur was so deeply molded I knew from the start that I'd just have to work with it. After the underlying skin tones were painted, I rendered the fur with Testors colors, chosen to match the theatrical hair as closely as possible. The crepe hair was attached with flat clear acrylic artist's medium. |
Horror Or Bust! Collection
 Horror Or Bust! CollectionI think it was at the 1996 IPMS Nationals in Columbus, Ohio that I started acquiring Geometric Designs' outstanding 1/4 scale resin busts. Eventually I had enough to compete with them as a collection. To make a proper presentation, I made a display base out of Styrofoam covered with Celluclay and Durham's Rock Hard Water putty. The 8 identical bases I found at a local bowling trophy shop set the limit for the number of busts I would have in the collection. |  Horror Or Bust! CollectionHere's another angle of the collection. During lunch on my way to WonderFest 2014, I realized that I'd forgotten to bring the base. As I was too far away to run back home to pick it up, I needed a substitute. This I found at a nearby Target store, a cheap black drape. I used it to cover the box in which I was transporting the models. The drape worked okay, but I'm still kicking myself for having forgotten my custom display base. |  Bride of Frankenstein_FrontI arranged the busts in alphabetical order on the base. The first was the Bride of Frankenstein. Joe Simon did a superb job of capturing Elsa Lanchester's likeness in the role. |
|---|---|---|
 Bride of Frankenstein_RightI don't usually make the scars of Dr. Frankenstein's creations look inflamed, because they didn't look that way in the films. But as Mr. Simon rendered the Bride's sutures as raised ridges, outlining them with red seemed appropriate. |  Bride of Frankenstein_LeftI painted the Bride's gown in pale greens for a "medical" look and because I thought it would emphasize the greens I used in her flesh tones. I'm not sure that idea was successful. |  Bride of Frankenstein_CUAlthough they were created by the same processes, the Bride was a newborn compared to her mate, the Frankenstein monster. I used the same basic procedure to color both characters, painting grayed flesh colors with artists oils over an olive drab base coat. But with the Bride, I first painted red and blue blood vessels over the O.D. base; they're visible under the flesh colors. |
 Bride of Frankenstein_BackThe Bride of Frankenstein bust is a testament to the quality of the molding of these busts. The hair is finely detailed, so much so that I had a hard time finding the thin mold-parting lines and cleaning them up. It almost wasn't worth the bother. |  The Creature Walks Among Us_FrontThis bust represents the Gill Man as he appeared in the last of Universal Studios' three Creature from the Black Lagoon films of the 1950s. Sculpted by Casey Love, it shows the Creature as he appeared after his outer scales and gills were burned in a fire. |  The Creature Walks Among Us_RightIn the film, it's established that the Creature is growing new, human flesh beneath its burned exterior. I tried to represent that idea by first airbrushing a baby pink mottled with blue veins over the bust. I drybrushed the raised details to represent the blackened tissue. The details were further emphasized by drybrushing with various greens. |
 The Creature Walks Among Us_LeftBecause his scaly hide is being replaced by human skin, the Creature requires clothes. A suit is tailored for him by sailors on the ship on which the Creature is being taken to the US. Made from sailcloth, the movie costume had heavy stitches elsewhere but none at the seams where the front and back halves of the tunic met. I added those stitches with Aves Apoxie Sculpt. |  The Creature Walks Among Us_CUThe film also mentions that the Creature's eyes were becoming human along with his skin. As far as I can tell, Don Megowan (who portrayed the land-lubbing Creature) had blue eyes. They make for a stark contrast, glaring out of the Creature's fishy face. |  The Creature Walks Among Us_BackThis piece is a fine example of how various clear finishes can add realism to a model. I gave the cloth suit a matte finish with Testors Dullcote. In the movie, the Creature's face had a shiny, wet look. A single application of Pledge with Future Floor Shine (or whatever they're calling it these days) achieved the wet look. |
 Ghost of FrankensteinHere is Lon Chaney, Jr. as the Monster in GHOST OF FRANKENSTEIN (1942). While Mike Hill's sculpture is outstanding, I did sand down the overstated "bulb" on the end of the Monster's nose. I also replaced the inaccurate white metal electrodes with new ones made from 1/16 inch diameter styrene rod. |  Ghost of Frankenstein_Close UpI used the "dot filter" method to add character to the Monster's flesh tones. Over the finished deathly skin colors, I applied little dots of artists oils: green, red, ochre, and burnt umber. The dots were faded with a brush moistened with mineral spirits until they were mere tints within the surrounding flesh colors. |  The Ghost of Frankenstein_RightIt's hard to see in the photos, but I detailed the eyes under the heavy lids. Lon Chaney, Jr. had blue eyes, so that's the color I painted them. |
 Ghost of Frankenstein_LeftEach bust came with a white metal nameplate, which impressed me greatly. I polished the metal and preserved it with a spray of Testors Metallizer Top Coat. Then I hand-brushed thinned Testors metallic paints in the background of the plates for a cloisonne effect. I chose colors that seemed appropriate for each character. |  The Mummy_FrontSculpted by Kenneth Newman, this is one of the finest representations of Boris Karloff in the classic role that I've ever seen. | 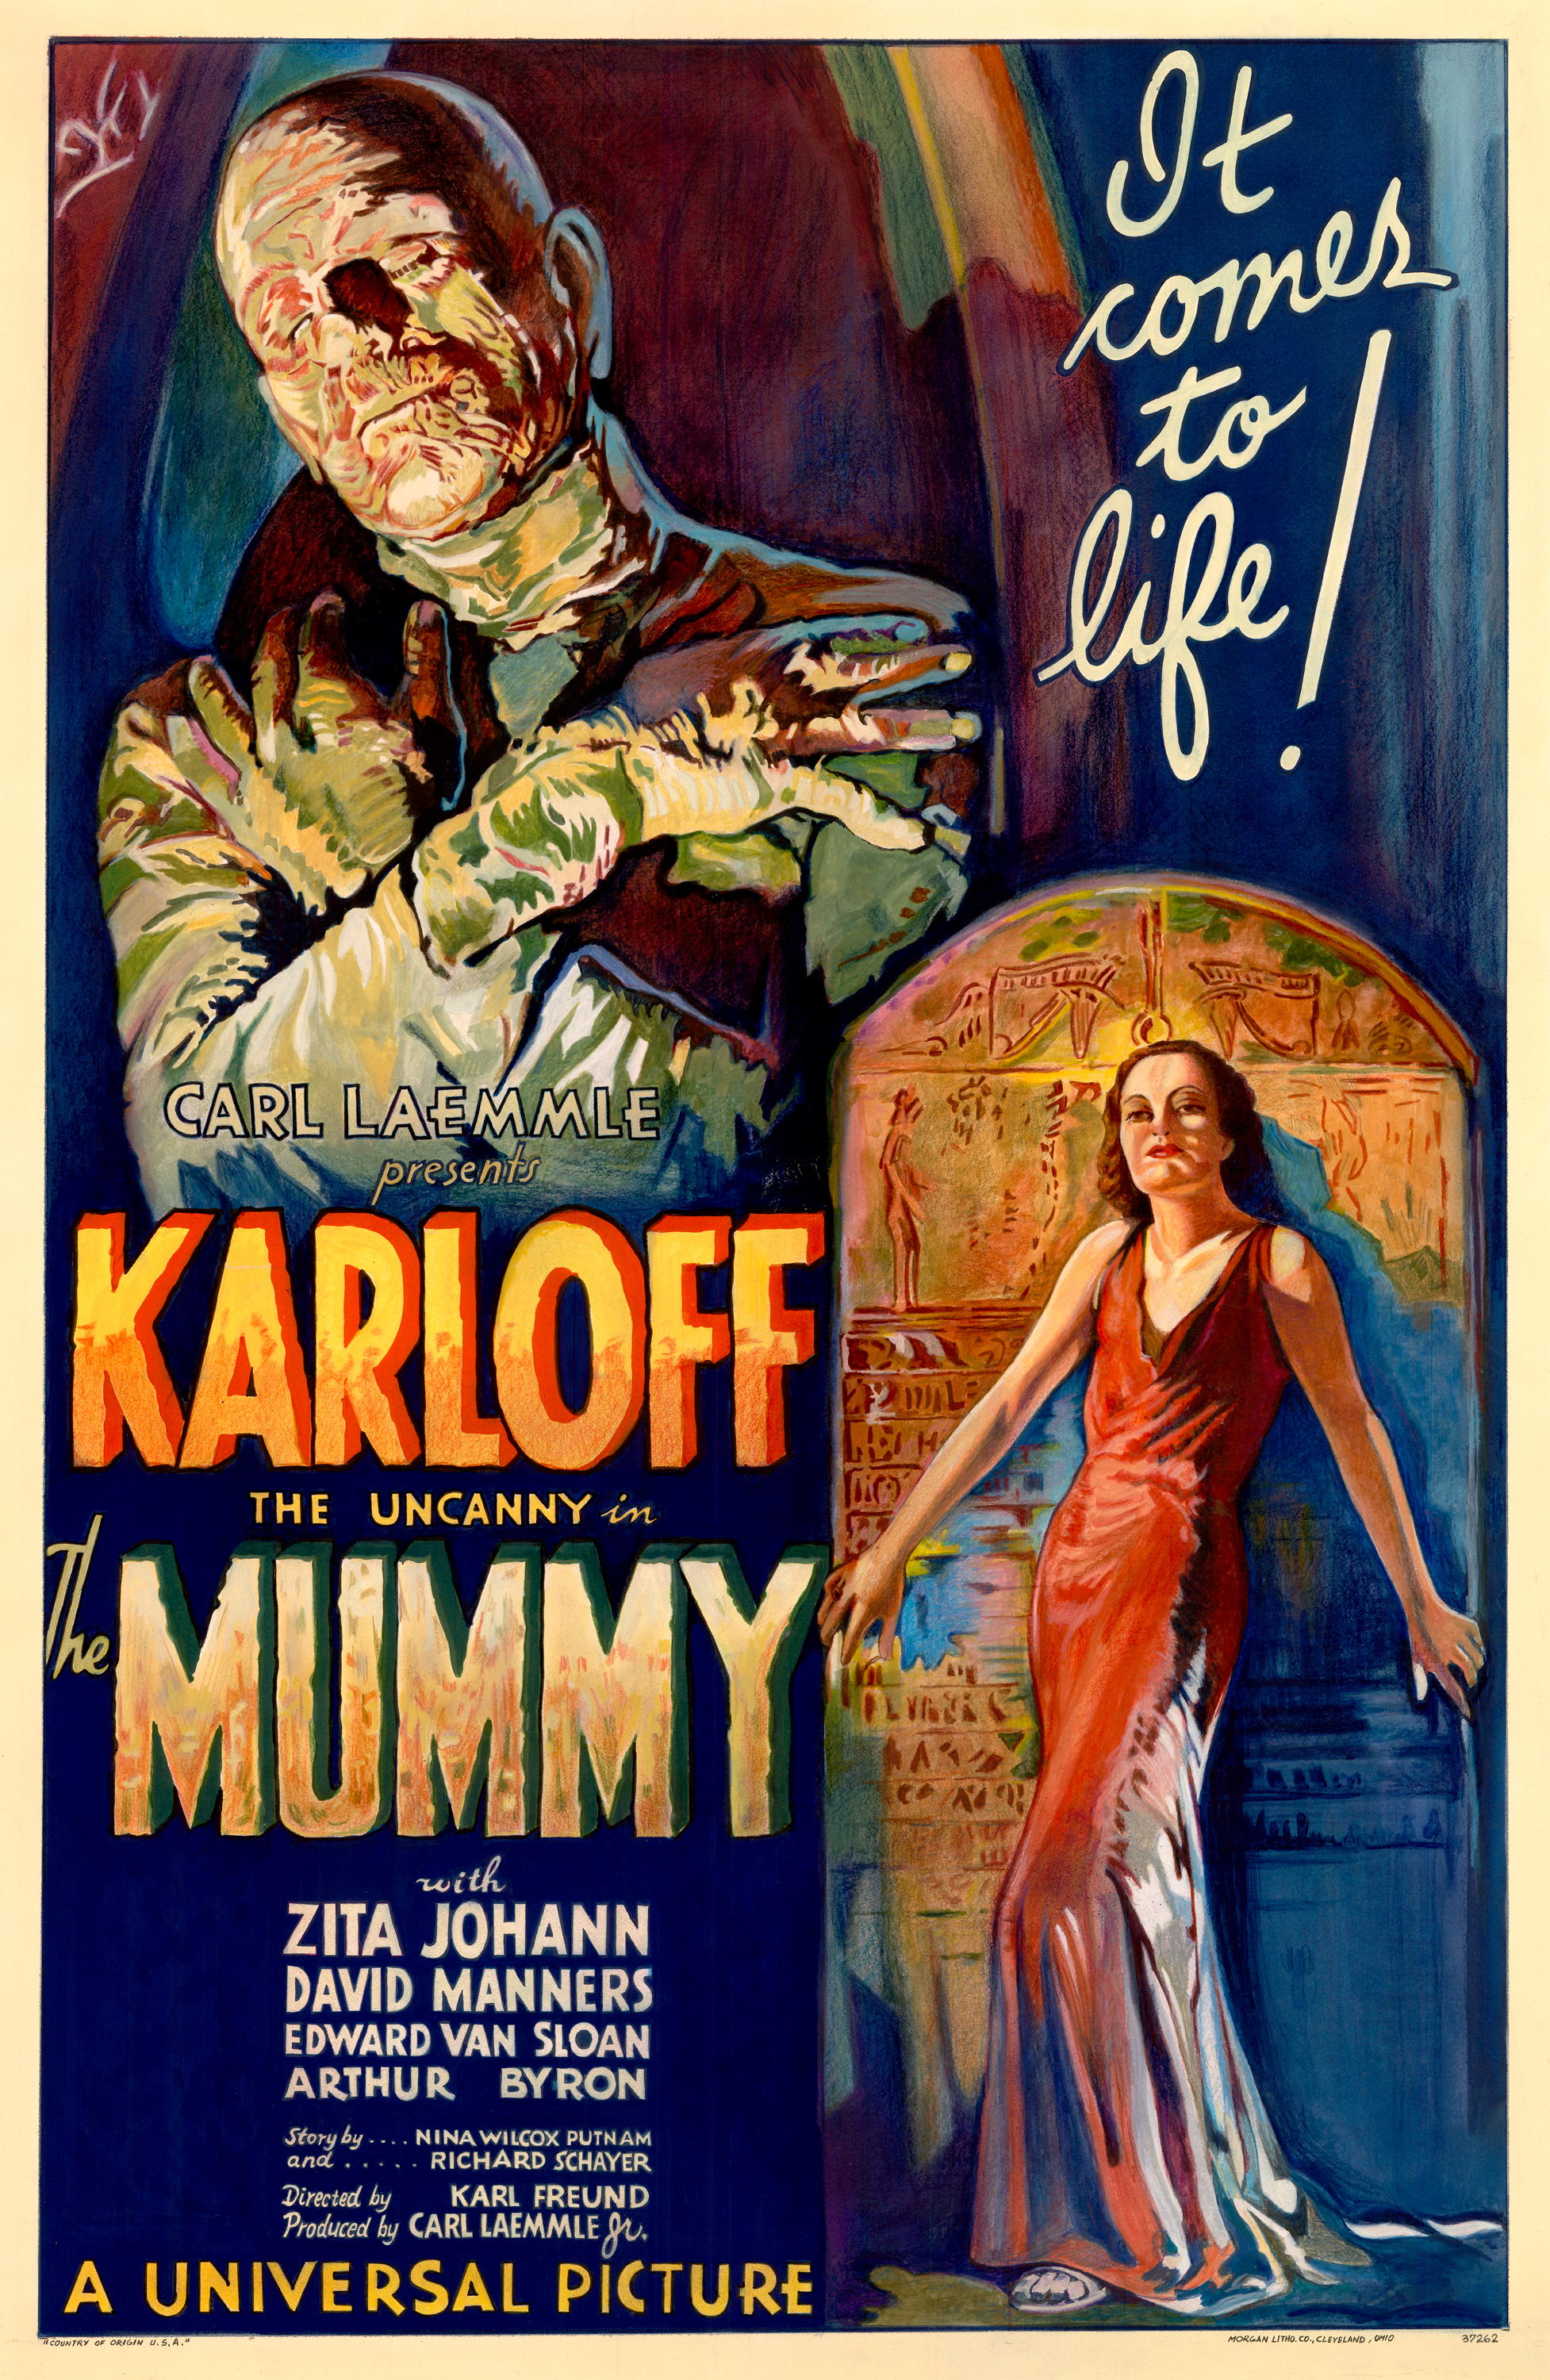 The Mummy_LeftI took care to paint the moist eyeballs, which are just visible in the slits of his partially opened lids. As the original publicity for the movie screamed, "It comes to life!" |
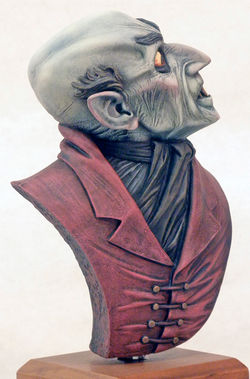
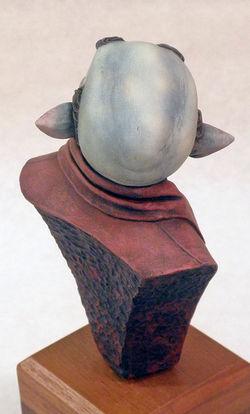
 The Mummy_RightArtists oils gave me the tightest control over the tiny wrinkles molded into The Mummy's face, but even those paints weren't subtle enough. I got just the effects I wanted with an eight-color paint set of good old Prang watercolors. |  The Mummy_BackIt can be difficult to find a color palette that distinguishes the Mummy's hair, flesh, and wrappings. You don't want a monochrome effect, but too many colors can look unrealistic. A trick I've used is to dust the painted model with ground up artist's pastels that have been mixed to a neutral brownish color to tie the various hues together. |  Nosferatu_FullThis bust was sculpted by T. Holter Bruckner (he prefers to be called "Tim", but that doesn't have the same panache, does it?). The color scheme I chose was based on the box illustration for the Monarch Models 1/8 scale plastic figure model of the monster. |
 Nosferatu_Rightin the 1922 movie, the centuries-old Nosferatu existed in a ruined castle and rats followed him wherever he went. Therefore I tried to create a dirty, aged look for the whole piece. Gray watercolors were applied to the clothes for a "dirty laundry" feel. |  Nosferatu_LeftI airbrushed splotches of white and gray over a light blue base to give the monster's flesh a cheesy appearance. The basic flesh colors were done with artists oils: flesh grayed with a touch of blue. Once again I broke out the watercolors, adding hints of yellowish gray and red to give a diseased look to Nosferatu's hemophiliac pallor. |  Nosferatu_CUMr. Bruckner left the positioning of the irises to the modeler. I gave Nosferatu's eye a downward cast, as if glaring at his next victim. |
 Nosferatu_BackThe underpainting is most evident on the top of Nosferatu's bald head. |  The Phantom of the Opera_FullThis is another sculpt by Mr. Bruckner. His Phantom was clearly based on the makeup worn by Lon Chaney, Sr. in the classic 1925 film. But the details in this bust are far more extreme than the makeup seen in the film. So I treated it as a representation of the character as described in the original 1911 novel by Gaston Leroux. |  The Phantom of the Opera_Right"...The very ABSENCE of that nose is a horrible thing to LOOK AT." So said the Paris Opera's scene-shifter in describing his encounter with Erik, the Opera Ghost of the novel. Since I was going to treat the bust as its literary source, I decided to cut off the nose with a razor saw. A Dremel tool restored the nostrils, and I finished the job with Aves. |
 The Phantom of the Opera_Left"...His skin is not white, but a nasty yellow..." said the scene-shifter. I added a little black to the yellowish flesh I used on the Phantom to impart the "nastiness". But, as is often the case, the black gave the yellow a greenish cast - not quite what I had in mind. |  The Phantom of the Opera_CUOnce again, the position of the eyes was left up to the builder. I took a photo of the unpainted bust and then used Microsoft Paint to place irises looking in various directions in the photo. I chose this pose for the effect it gives, that the Phantom is considering some really awful scheme. |  The Phantom of the Opera_BackI applied the flesh colors over a mottled base coat of white and dark gray. I was very happy with the Phantom's eyes and teeth. Rubbing the topmost contours of the hair with a paper towel gave them a realistic sheen against flat colors in the recesses. |
 The Unnamable_FullThis critter appeared in two movies, THE UNNAMABLE (1988) and THE UNNAMABLE II: THE STATEMENT OF RANDOLPH CARTER (1992). The bust was a gift from Richard Cacioppo, a fellow Black Swamp Modeler. |  The Unnamable_FrontActually, "The Unnamable" did have a name: Alyda Winthrop. In the 1988 movie and its sequel, Alyda was the result of a liaison between her human mother and a demon. Neither film had more than the title in common with H. P. Lovecraft's original story. |  The Unnamable_LeftI was more influenced by Alyda's appearance in the sequel when I painted this bust. The skin around the eyes was a bit darker and more feral-looking. The veins were given a bluish cast and touches of red were added for a "live" appearance. |
 The Unnamable_RightThe sculpture is highly detailed, which makes it very easy to paint. There's a certain dignity in the pose of the bust that I found charming. Joe Simon sculpted this one; as it happened, his two creatures are also the only two females in the collection. |  The Unnamable_BackIn both movies, Alyda's hair was very light and fluffy. For a time I considered grinding off the resin hair detail and replacing it with crepe hair. But then I realized that real hair would look too coarse on the 1/4 scale bust. |  The Werewolf Of LondonThis is another gem, sculpted by Mike Hill. It's a highly accurate rendering of Henry Hull in the makeup by Jack Pierce as seen in WEREWOLF OF LONDON (1935). |
 The Werewolf of London_FrontThe eyes are challenge to paint, given the Werewolf's snarling expression. I painted them yellow, like those a real wolf. This is the only bust I've painted where I found it necessary to mist it with a light color, a pale tan, in order to tie all the different colors together and tone down the contrasts. The trick with this technique is to stop before you think you need to; it's REALLY easy to overdo. |  The Werewolf of London_RightWith most models based on old movie monsters, I have to choose a scheme by interpreting the gray tones of the black and white film into colored paint. Some modelers actually do paint their models to resemble the b & w movies, but I don't have the heart to do that. |  The Werewolf of London_LeftThe scarf has really good contours and textures molded into it. Careful painting can make it look like real fabric. This is another evidence of Mr. Hill's sculpting ability. |
 The Werewolf of London_BackIn 2021, it became necessary to sell off some of my build ups in order to make room for more models. I'd have liked to have sold the "Horror or Bust" collection as a single lot, but - alas - it didn't work out that way. However, I was flattered that Mr. George Stephenson, the founder of Geometric Design, purchased a couple of my busts. |
bottom of page